DIY tie-dyeing


I LOVE to tie-dye! As soon as the weather gets a little bit warmer and we’ve had our first proper sunny day of the year, I’ve whipped out the buckets and set up some tie-dye! I have done a lot of tie-dyeing over the years, trying many different dyes and technqiues. I wanted to share with you my step by step guide to tie-dyeing so you can get creative this summer!
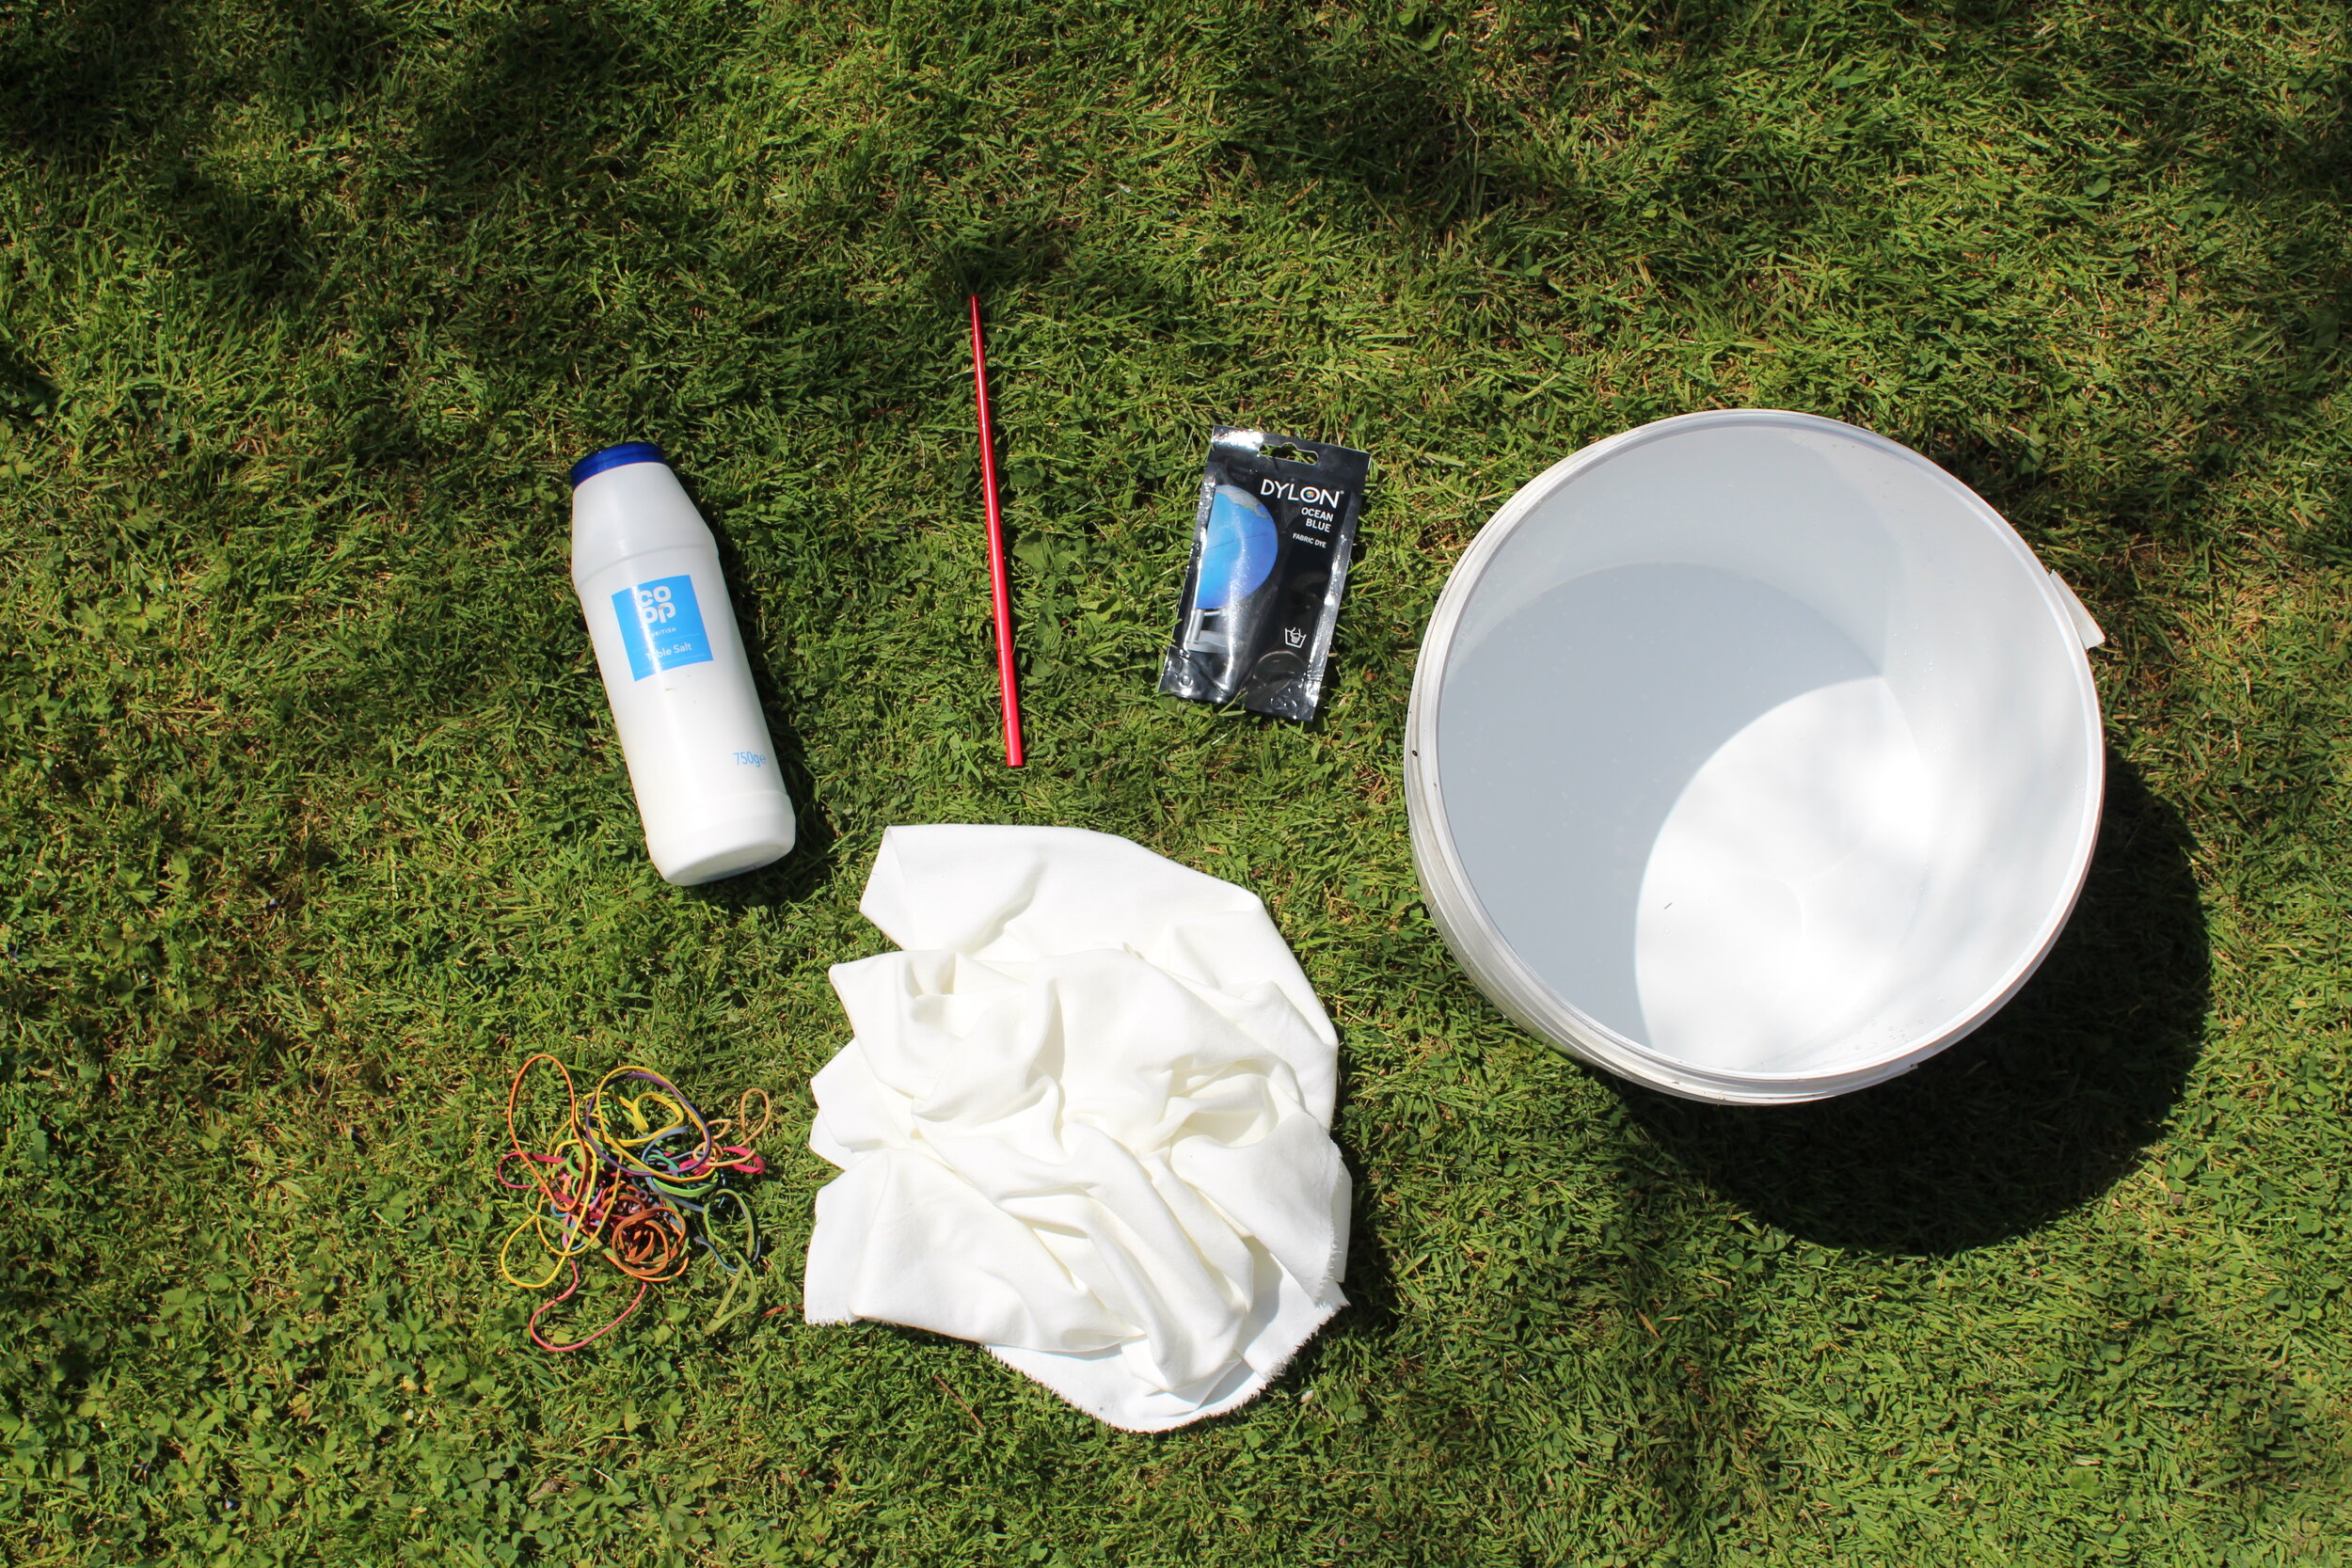
You’ll Need
Water
Salt
Dye (I used Dylon’s hand dye in Ocean Blue here)
Bucket
Elastic bands or string
Something to stir the dye with (I use a plastic chop stick)
Fabric/garment to dye
A few notes before starting…
I’m using Dylon hand dye. It’s one I have used many times before because It’s super easy to get your hands on in the UK and it’s reliable. When setting up the dye bath I’ll be following the instructions on the packet here.
Check the dye to see which fibres it will work with, most work for synthetic and natural fibres but not always.
While we’re talking about the fabric you’re using, make sure to pop it in the wash before tie-dyeing, just a quick cycle in the machine is fine. This will help to remove any coatings that may be on the fabric which could interfere with the dyeing process.

Wet your fabric and run it underneath the cold tap to saturate it.

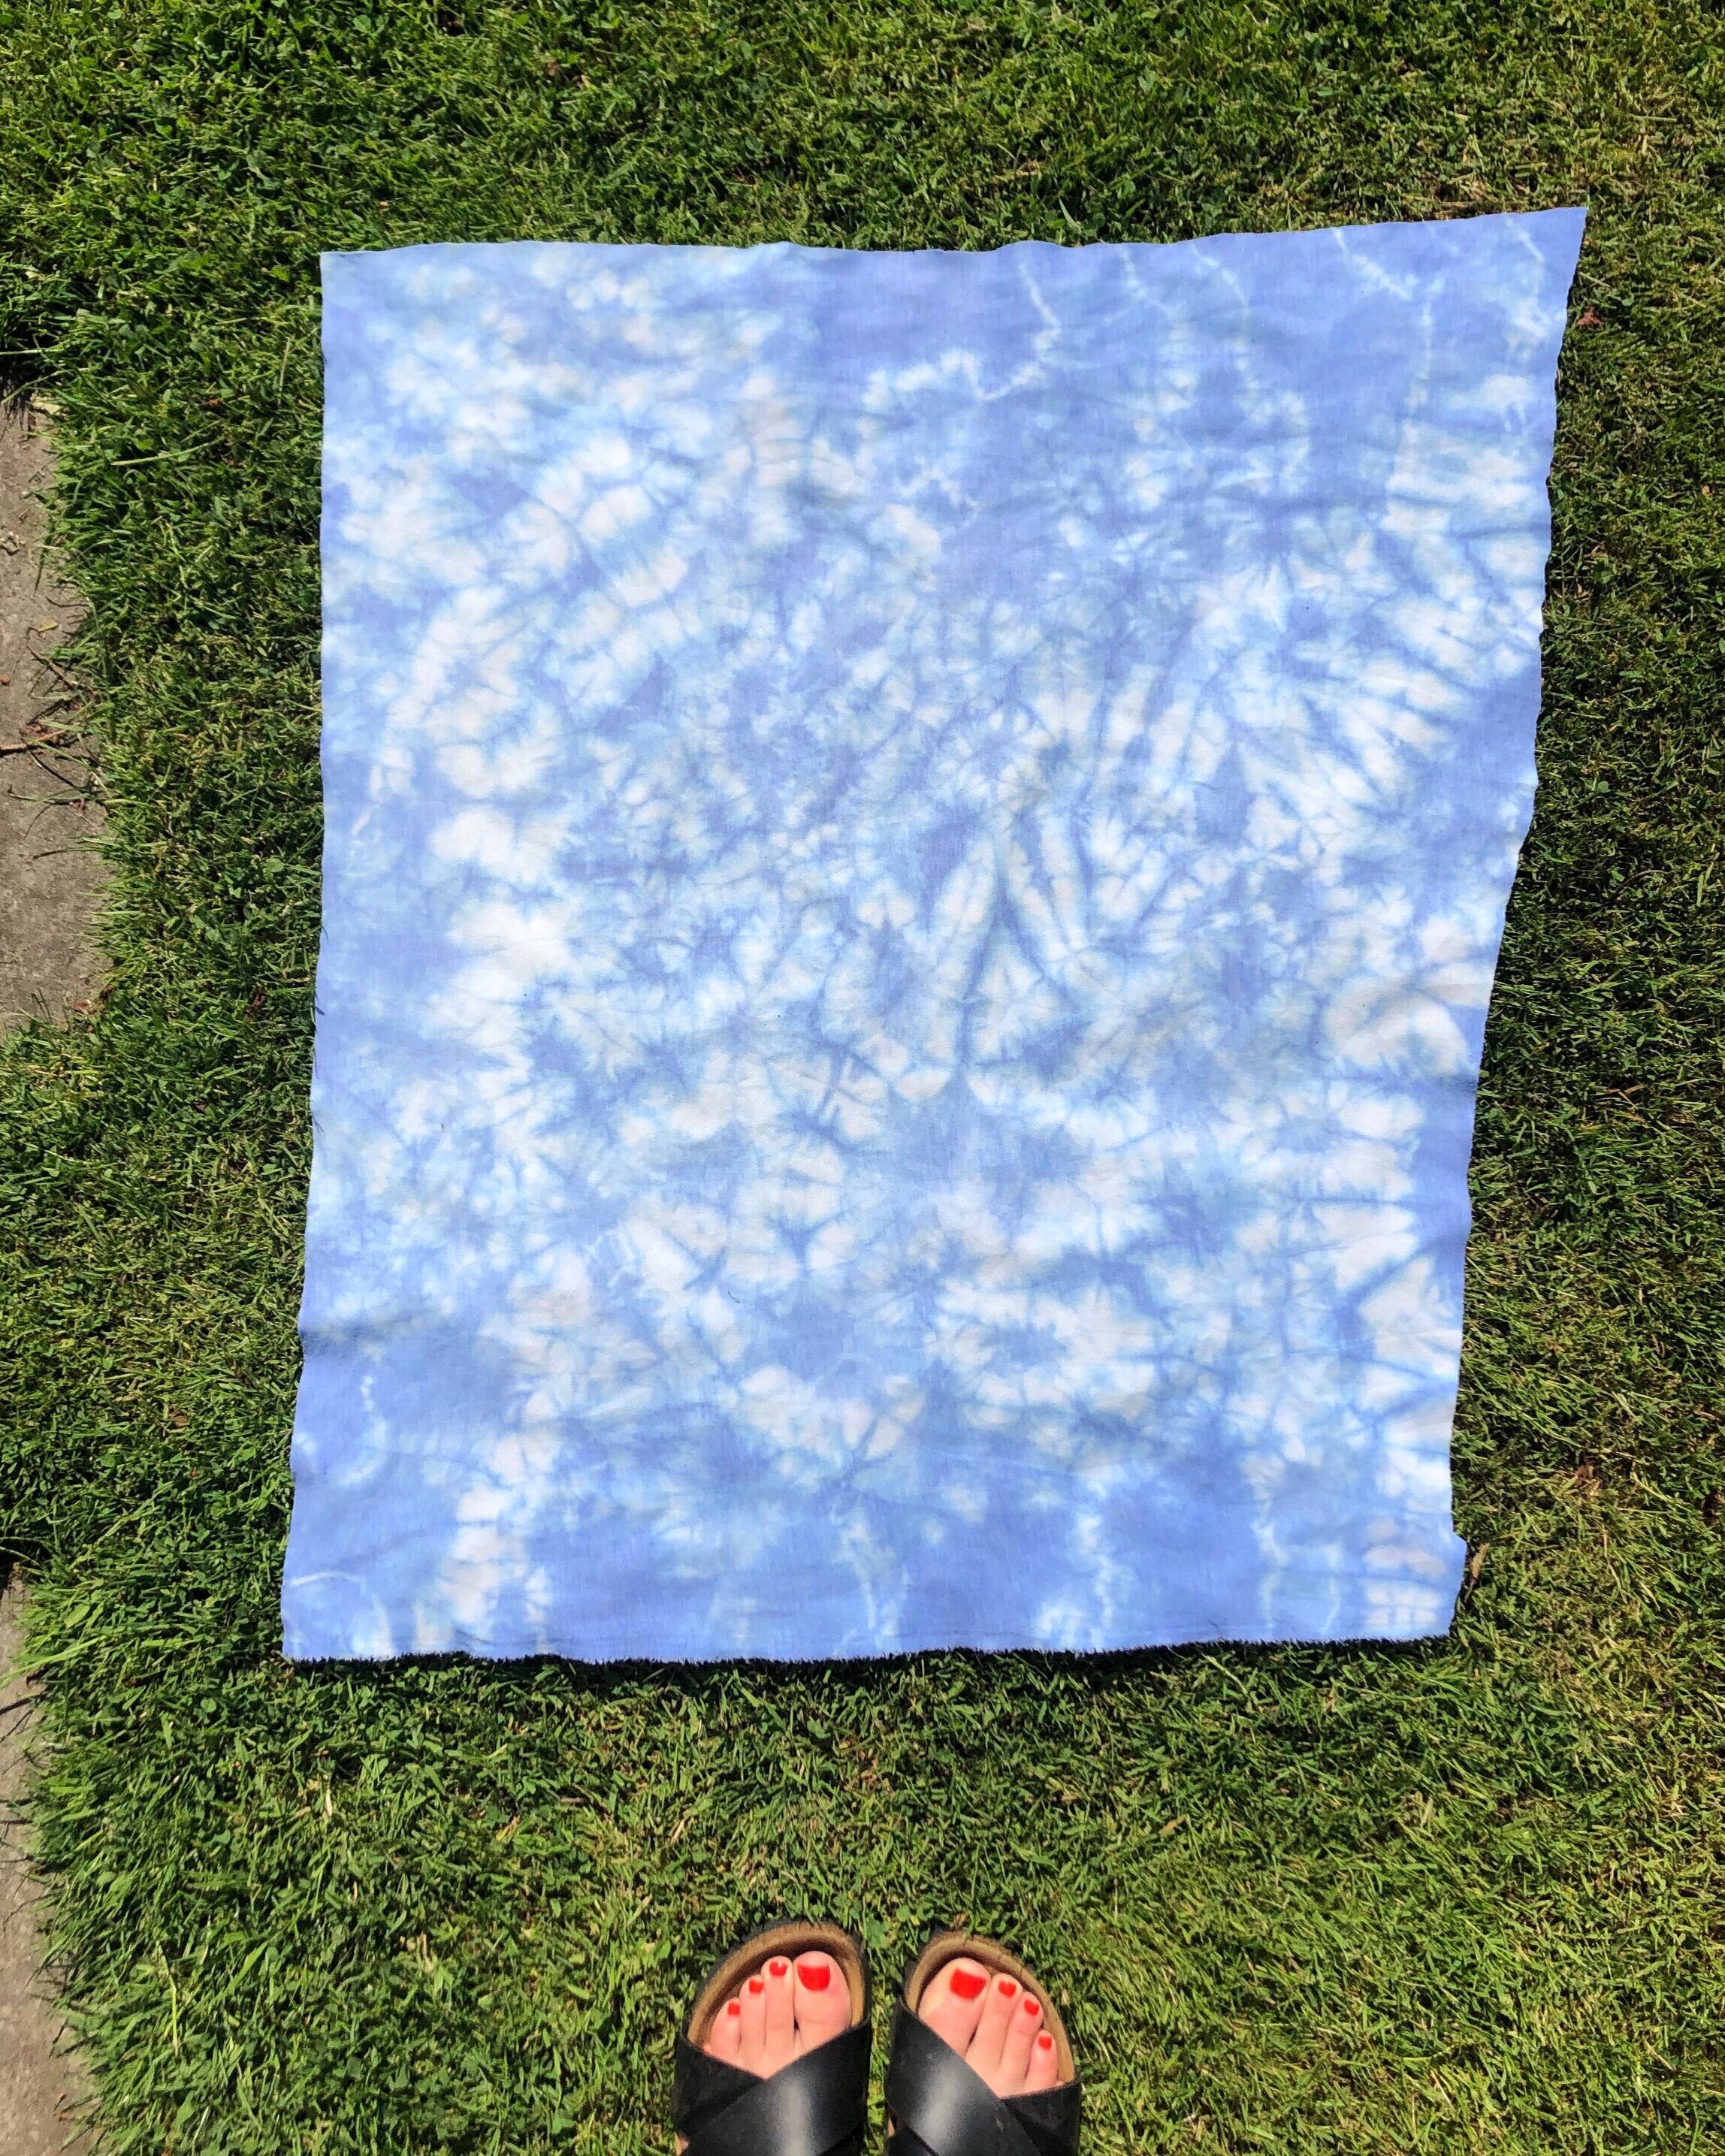
2. Tie up your fabric. There are many different ways to do this, each producing a different pattern once the fabric is dyed. I really like the ‘crinkle’ method as it gives an organic pattern, as shown in the photos at the very top of the blog post.
3. To tie using the crinkle process, lay your fabric on the table completely flat and still damp. Start in the centre and gently pinch the fabric together, using all four fingers and thumb. Do one pinch and then move onto the next, working from the centre out. Keep going until the whole fabric is pinched and gathered up.


4. Next open up an elastic band with both hands and slide underneath the fabric and release to hold those gathers in place. The first elastic band really squashes the fabric down, it feels a little messy at first but don’t worry it will come together. Take it slow and add another elastic band, once 4-5 bands have been used the fabric will start to feel more solid. The more bands you use the tighter the fabric is tied, which means the less dye will get to the fabric. You don’t overload it with elastic bands but you equally want enough to hold the fabric in place. I have used 10 bands for this tie-dye effect. If you wanted more dye on the fabric when you’re finished you can always dye again over the top, just follow this exact process again.
5. Set up the dye following the packet instructions using your bucket. Make sure to stir thoroughly.


6. Add your fabric! The dye packet will tell you how long to leave to leave the fabric in the dye. A general rule of thumb, the longer you leave the fabric in the dye the more intense the colour.

7. Once it’s been in long enough, remove your fabric from the dye bucket. Ignore my naked hands here…I would definitely recommend wearing gloves, my hands had a blue tinge after this! Squeeze the fabric over the dye bucket to remove any excess.


8. Rinse the fabric under the a cold tap until the water runs clear from the fabric.


9. Now the best part of the whole process - untying the fabric to reveal the tie-dye patterns. Remove the elastic bands one by one and admire your hard work!
10. Once you’ve finished looking at the patterns, pop it in the washing machine on a quick cool wash, mine has a 15 minute wash at 30 degrees which is perfect!

12. Finally take your fabric out of the washing machine, leave to dry and you’re all done!